
An automated accessibility report is the first step in checking to make sure your PDF meets accessibility standards. A report will also be required to be included when submitting a Web Request to upload a PDF to any of our public websites.
An accessibility report is an automated summary of findings produced by Adobe Acrobat Pro that details whether a PDF conforms to the accessibility rules set forth by the Web Content Accessibility Guidelines (WCAG 2.0). Rules include, but are not limited to, the presence of alternative text for images and figures, the presence of appropriate metadata, the correct implementation of lists, and the presence of a document title.
An accessibility report can be created and exported using Adobe Acrobat Pro. All employees should have this program installed on their computer by default. If you do not have Adobe Acrobat Pro installed, you can sign into Adobe.com with your University email to gain access or reach out to the Help Desk for further assistance.
How to create an accessibility report
- Open your PDF in Adobe Acrobat.
- Select Accessibility from the Tools display.
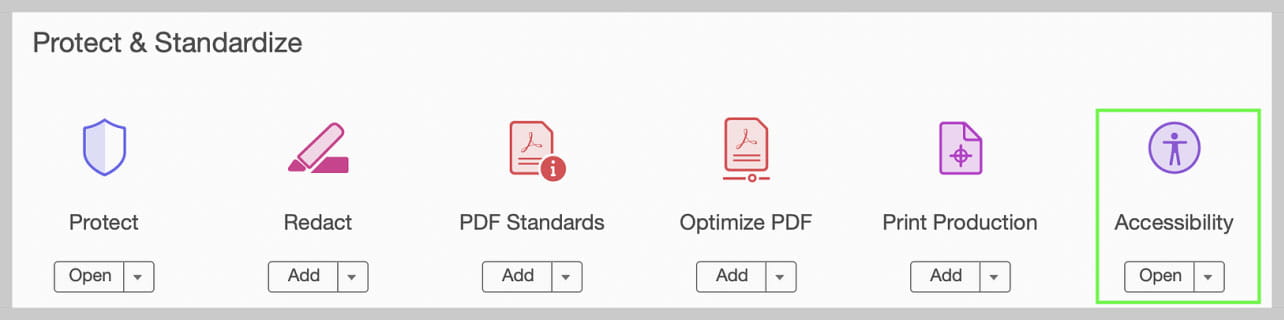
- If “Accessibility” is not an option, from the menu bar click on “View > Tools > Accessibility” to display the Accessibility Tools option.
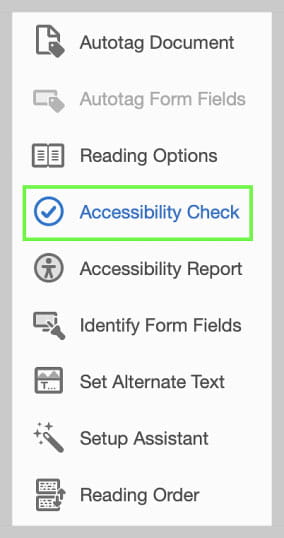
- Click on Accessibility Check.
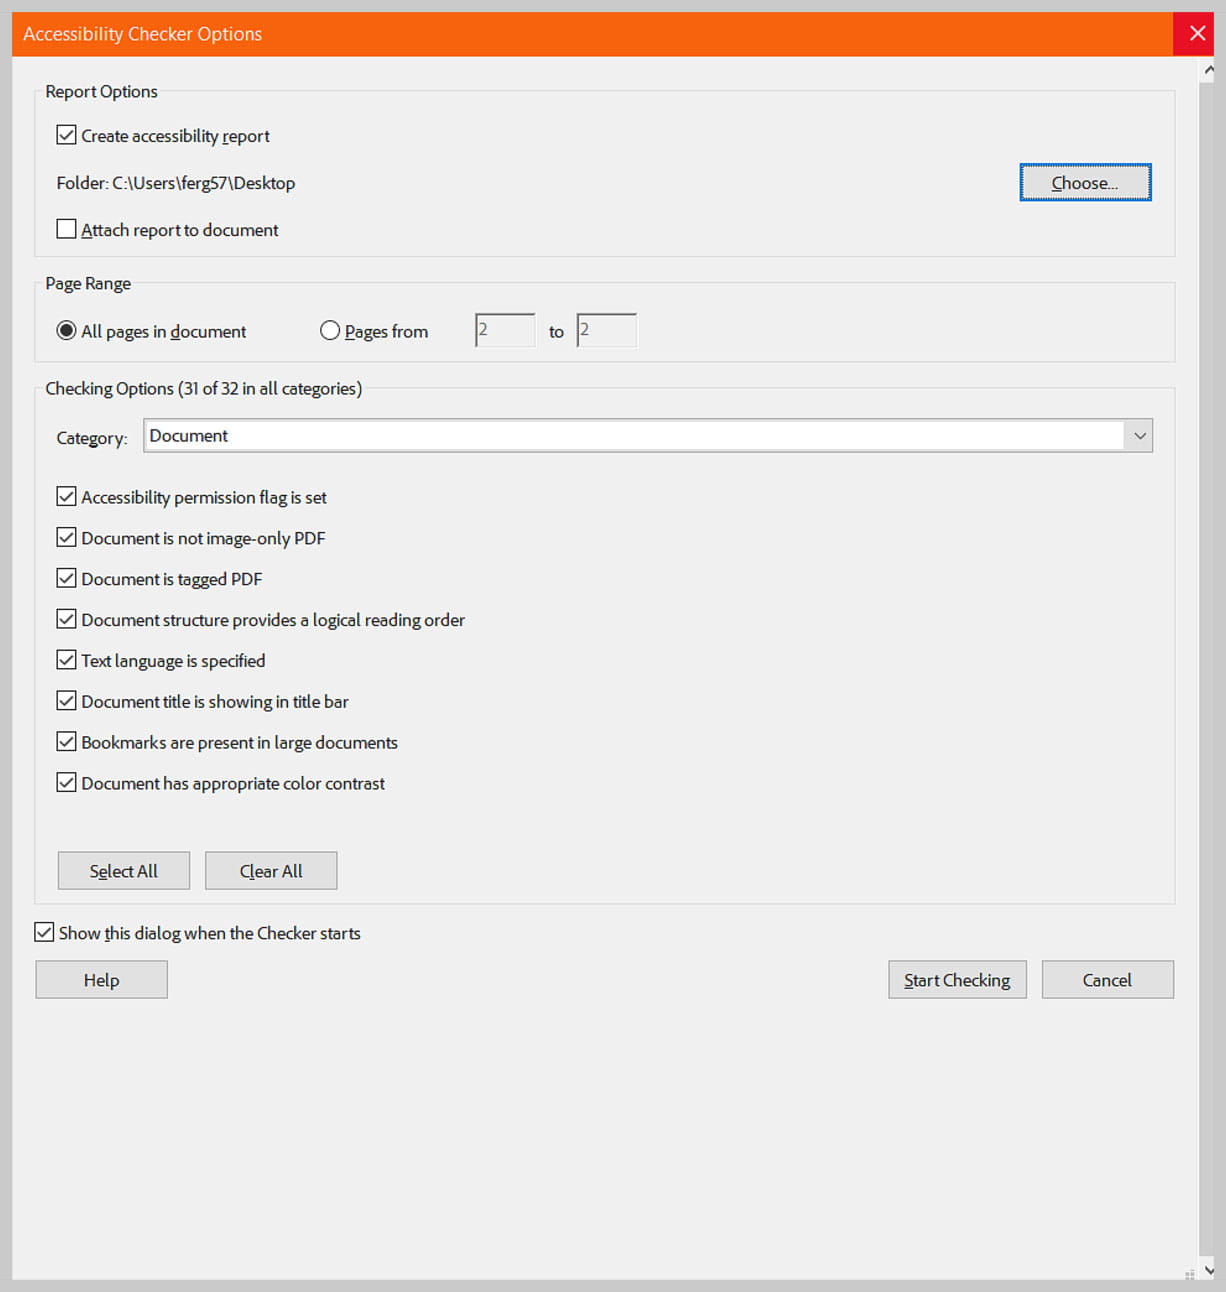
- On the Accessibility Checker Options screen:
- Check the box for “Create accessibility report” and choose the location where you want to save the generated report
- Uncheck the “Attach report to document” checkbox. This ensures the report will be created as a separate file. This separate file must then be uploaded alongside the original document in the Web Request.
- Under Checking Options, use the default options selects (31 of 32 in all categories).
- Click the “Start Checking” button.
- Review the output of the report to ensure all areas pass the automated accessibility check.
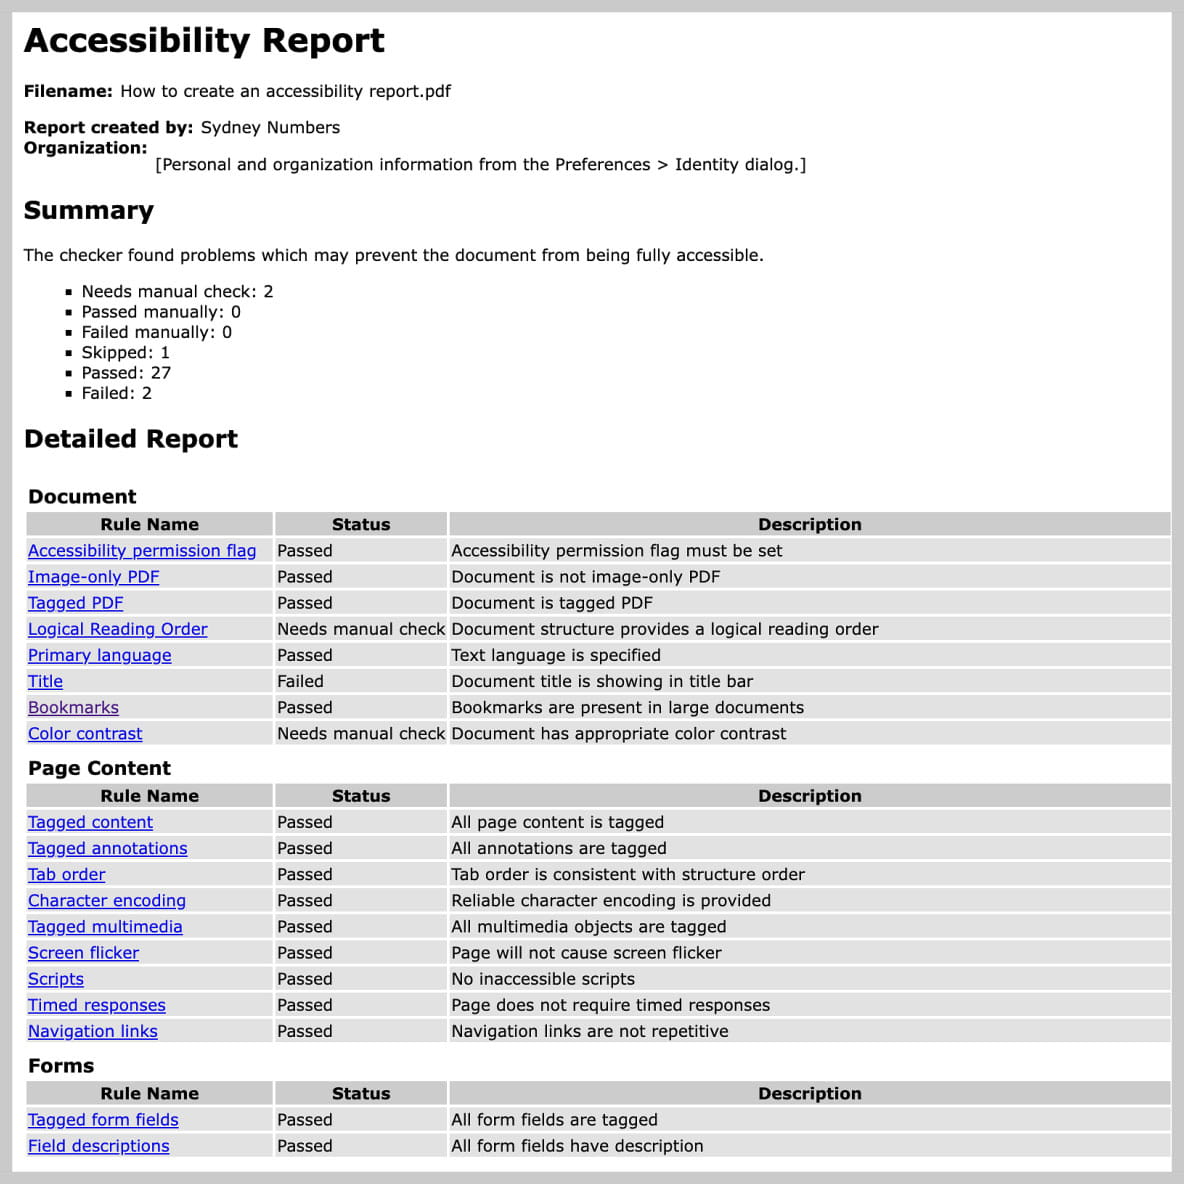
- Please note, logical reading order and color Contrast will always be noted as needing a manual check. Be sure to look at these two areas specifically to ensure they meet required standards.
- If the PDF passes in all categories, you can submit your PDF to be uploaded to our website. Please be sure to include the generated accessibility report along with your request.
- If the PDF does not pass all categories, please make the appropriate changes to your source document or PDF to fix the reported issues and rerun the automated accessibility check.
Please note: The accessibility report does not automatically check for certain requirements, including appropriate color contrast, logical reading order, appropriate tagging, form fields, tables, and bookmarks (when applicable). You should manually review your document to confirm it meets these accessibility standards as well. PDFs and other documents submitted in Workfront’s Web Request form will be spot checked to confirm they are compliant
Workfront Web Request Form
If you are submitting your document to be posted to a website using our Web Request form, upload the report (HTML file) showing zero reported errors in the Documents section in the Web Request form along with the document that should be posted on the website.
If an Accessibility Report is not attached or it contains errors, the request will be sent back.
If a passing Accessibility Report is attached, the PDF document will be spot checked, specifically looking at those areas that the Accessibility Report cannot verify (e.g. color contrast and logical reading order). If there are any errors found during the spot check, the PDF will be sent back to be corrected.
More information about the Accessibility features in Adobe Acrobat Pro can be found on Adobe’s website.